Soft Pastel For Beginners
You’ve found the right place to enjoy a new journey discovering the delights of soft pastel for beginners. I’m so happy to be able to share my knowledge with you!
My name is Sue Kerrigan-Harris and I’m a Professional Artist and Art Tutor with a passion for soft pastel. Welcome to my world of Soft Pastel. Read on to find out more…


Here’s what I’m going to share with you and at the end you can download a free printable quick start guide and some free soft pastel tutorials to get you started:
1. Get started with Soft Pastel Right Now (you just want to know what to buy to get started)
2. What are soft pastels?
2a. The difference between soft pastel, chalk and oil pastel
3. Types of Soft Pastel
3a. Soft Pastel Sticks
3b. Hard Pastel Sticks
3c. Beginners Soft Pastels
3d. Professional Soft Pastels
3e. Pan Pastels
3f. Pastel Pencils
4. Pastel Paper
4a. Traditional Paper
4b. Sanded Paper
4c.Coated Paper
4d. Best Beginners Pastel Paper
5. Equipment you’ll need to get started
5a Table Set Up
5b Blending Tools
5c Sharpeners
6. Fixative
7. Safety
8. Techniques for Beginners
8a Layers
8b Blending
8c Pressure
1. Get Started with Soft Pastel for Beginners
There are so many brands it can be VERY CONFUSING and even put you off! To SAVE you hours of research and to save you a TON of money. Here’s what I recommend to all who are new to soft pastel.
This is what I recommend to all students who are just starting with Soft Pastel.
Pastel Paper: Pastelmat or Wet & Dry Paper 1000-1200 GRIT from the Hardware Store. Mind your fingers though. (More info in my free tutorial about using sand paper)
Soft Pastel Sticks: Jaxell 72 set or Inscribe 64 set. Get the biggest set you can afford.
Pastel Pencils: Carbothello 60 set or the biggest set you can afford.
Tools: Tortillon blenders and rubber blenders.
Rubber: Kneadable Medium Putty Rubber.
Damp Cloth for your hands.
A board and/or an easel.
Graphite paper to transfer your drawings to pastel paper or to trace. (If you’re drawing skills are rusty then it’s best to transfer your sketch)


Want to learn about SOFT PASTEL?
Download my
FREE Quick Start Beginners Guide & 2 FREE Tutorials
2. What Are Soft Pastels?
Soft Pastel is made from pure pigment with a little binder to form it into a stick. The binder to pigment ratio determines the quality in terms of light-fastness and softness and also price. If you add linseed oil to a soft pastel you have oil paint, if you add water, you have watercolour and gouache, if you add acrylic, you have acrylic paint. Of course there are other elements that go into making these mediums too. Soft pastels come in different forms, soft pastel sticks; hard pastel sticks, pastel pencils and pan pastels.
2a. The Difference Between Soft Pastel, Oil Pastel and Chalk
Before we get into soft pastel there is a common confusion / myth I want to clear up for you. soft pastel, oil pastel and chalk are not the same. Soft pastel is pure, rich, intense pigment (powder) and binder to hold the pigment together, chalk is lime coloured with dye (very weak compared to pigment) and oil pastels are like children’s crayons made from none-drying oil and wax.

3. Types of Soft Pastel
Available in square profile, round profile, soft, hard, pans and pencils, soft pastel is truly versatile and a lot of fun, with no drying time! With all these options it can cause you some confusion. Essentially the softer the pastel the more pigment it has and the more lightfast and vibrant the colour is on the pastel paper. Let me explain the types:
3a. Soft Pastel Sticks
These pastels can be round or square in profile, it just depends on how they are made; hand rolled or machine made. They are generally fairly thick due to their softness because they contain less binder than harder sticks. The term soft pastel covers pastels from student brands all the way through to professional brands. Most student brands can be as hard as hard pastel sticks, just a little thicker. this is why it’s confusing. Many manufacturers supply half stick sizes, about an inch long (2.5cm) and full stick sizes about 2 inches long (5cm) It’s a good idea to get the half stick sets as a beginner because you’ll get a greater colour choice in your set.

3b. Hard Pastel Sticks
Hard pastel sticks are useful on paper with less tooth and they can be used to draw with. They are generally long, thin and square in profile. Hard pastels have more binder than soft pastels. It is the binder in hard pastels that makes them harder. They are also good for fine lines such as whiskers and hairs. Top brands include Conte A Paris, Faber Castell Polychromos Soft Pastels, Caran D’Ache Sticks and Nupastel. There aren’t any mid and student range brands that are classed as hard sticks.

3c. Beginners Soft Pastels
I recommend student range soft pastels such as Jaxell and Mungyo for beginners because they are harder than professional and mid-range pastels and therefore easier to control. One of the techniques I teach my students is to control the pressure and it’s a lot easier to do that with harder sticks because you have to press harder with harder sticks to release the pigment.
3d. Professional Soft Pastels
Professional soft pastels like Unison Colour are sheer joy to use. Once I have taught you to be light handed, these pastels are easier to use. A lot of beginners, myself included have no idea that controlling the pressure is one of the top skills to learn as a pastel artist. These pastels contain a high amount of pigment which make them very rich in colour and you only need a small amount compared to harder sticks where you might need several layers before you get bright colours.
Soft Pastel sticks are available in student, mid and professional ranges, here are some of the best:
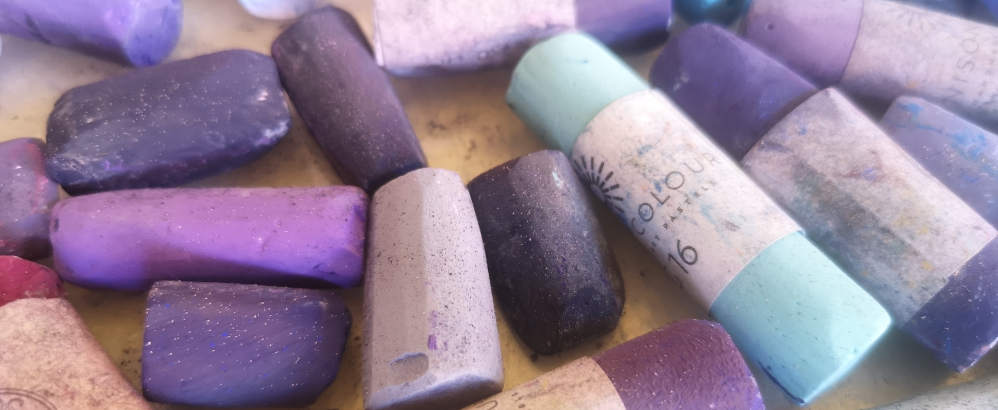
Unison Colour Soft Pastel
Unison Colour soft pastels are possibly the best pastels in the world and they are my favourite. They have a special place in my heart because I love using them and they are soft but not too soft and British Made – hand rolled in Northumberland by John Hersey and his company.
Other professional soft pastels include Sennelier, Schmincke and Terry Ludwig
Mid-Range Soft Pastels
Mungyo handmade, Rembrandt, Jacksons and Mount Vision
Student range soft pastels
I recommend Jaxell half sticks or Inscribe / Mungyo sticks. The Jaxells are larger that the Inscribe so they are better for larger hands.
You will be able to tell the quality of your soft pastels by the price. Most top quality brands range from £3 – £5 a stick. Whereas, the student range can be bought for as little as £5-8 for a set.
And finally, let’s not forget Henri Roche pastels from La Maison du Pastel at around £20 a stick – these are unquestionably the most expensive pastels in the world with the highest pigment ratio – I would hope! The oldest pastel manufacturer in the world with over 1200 colours to choose from. Unison have a range of 422 colours.
3e. Pan Pastels
Pan Pastels are round pans of pastel pigment that look a lot like eye makeup and blusher! They can be applied with sponges and sponge applicators that look similar to a palette knife with a sponge on the end. They are useful for all sorts of different effects and can be used for underpaintings, Bokeh (out of focus) backgrounds and loose painting styles. I absolutely love pan pastels for creating soft focus bokeh backgrounds. This technique helps the subject stand out in the painting.
3f. Pastel Pencils
Pastel pencils are perfect for details, small areas where you can’t use a stick and eyes! I love using my pastel pencils for eyes with a dash of soft pastel too.
Pastel pencils can be used for the whole painting or for detail. It is easier to use pastel pencils over harder pastels but as you gain experience you will find you can use pastel pencils over soft pastel by limiting the amount of soft pastel you apply. This is another reason why I advise beginners to start with student soft pastels. Pastel pencils also range from hard to soft: Carbothello / Derwent / Pitt by Faber Castell / Cretacolor / Koh-i-Noor / Bruynzeel /Caran D’ache (very soft)
Most artists use a range of brands to obtain the greatest colour choice.

4. Pastel Paper
The surprising thing about about soft pastel is the paper. Your paper choice could very easily put you off soft pastel FOR LIFE!
There’s a lot of pastel paper out there that’s cheap and nasty and will do a really good job of creating a muddy mess with just a tiny little bit of effort from you.
AND then….
There are some A-MA-ZING pastel papers that make your pastel sing with beautiful rich colour, no mudiness and no mess!
(well, maybe just a bit when you’re learning but follow my soft pastel tutorials and you’ll see how not to do this!)
So get yourself a great pastel paper like a small Pastelmat pad, they come in 4 colour combinations. choose your favourite colour combination to start with. Great Art is a great place to by Pastelmat.
Now, Pastelmat is amazing but a tad pricey for practice so I want to give you an alternate for when you’re just practicing. this paper also makes colour sing!
Wet & Dry Paper 1000-1200 GRIT from the Hardware Store. Anything from 800GRIT is great to try. Yes really!
Wet & Dry Paper
This is an excellent paper choice and Ideal for beginners. Why? Because pastel paper needs tooth / texture for the pastel to grip to. This paper is virtually identical in texture to professional sanded pastel papers like UART and Fisher 400 but at a fraction of the price. One word of warning. You have to be super careful when blending with your fingers. It is sand paper after all and it is abrasive so only blend with your fingers where there is pastel or you will take the skin off your fingers. If you want to see how to use this paper you can get a FREE Quick Start Beginners Guide to Soft Pastels and a seascape tutorial below.
Any paper with a good tooth, not smooth paper such as printer paper is ok for soft pastel. Sugar paper can work well and rough watercolour paper can also be used. You can also make your own using an Acrylic Ground or Gesso to coat the surface. Gesso is made from white Acrylic and finely ground sand to create a textured surface.

4a. Traditional Paper
Some examples of textured pastel paper are Daler Rowney Murano paper, Canson Mi-Tientes paper, Ingres Paper. The Canson paper has a rough and a smooth side. There is also Strathmore 400 Series and rough watercolour paper.
Canson Mi-Teintes
160gsm paper with a different texture on either side: a honeycombed side and fine grain on the other. 50 light-resistant tones
I started out using Canson paper and for a while I used it for my people portraits. However, as soon as I wanted to do an animal portrait where lots of layers were required I struggled to get fur definition and texture. This led me to explore other options. That is not to say that it is not possible to do animals on these types of papers, it just wasn’t for me and the way that my techniques were evolving.
Lenox 100 Paper
Made by Legion 250gsm 100% cotton paper. A strong paper similar to the smooth side of Canson paper or watercolour paper
Lana Paper
Lana Colour range from Hahnemühle is a 45% cotton rag paper which is textured on one side and smooth on the other – similar to Canson paper. The 160gsm weight paper contains 45% cotton which will allow for extra scraping and rubbing back, therefore it is a durable surface to create your pastel paintings on. Acid free and age resistant.
Ingres Pastel Paper
Ingres is a type of paper named after the Neoclassical French painter Jean-Auguste-Dominique Ingres. Its unique texture is formed on a cylinder mould machine by pressing the paper fibres between the cylinder mesh and the marking felt. This surface texture is known as a chain and laid line surface. Daler-Rowney’s Ingres paper provides excellent tooth for traditional pastel work. This range comes in two spirals, one with 6 assorted colours and one with 3 assorted whites in a variety of sizes
Fabriano Tiziano Pastel Paper
160gsm paper produced with a high cotton content. It is acid free to guarantee longevity.
4b. Sanded Paper
These are very similar to wet and dry sand paper. The abrasive surface holds on to the pastel and allows many layers and it is water resistant. Wet and dry paper can be used for practice as a less expensive alternative, the difference is that it is not archival (it will not last 100 years or more) but that’s ok for practice. Some brands make different grits – from a very fine texture right up to a very rough texture. The UArt brand has 240, 280, 320, 400, 500, 600 and 800 grit.
Other Sanded Papers:
Fisher 400 paper which is similar to Uart – this comes in one grit – 400.
Canson Mi-Teintes Touch
Art Spectrum ColourFix coated papers, the surface has been sprayed to create a medium rough texture. ColourFix is also available in a smooth texture.
Sennelier A La Carte Pastel Card which looks like sand paper.
4c.Coated Paper
Coated papers are manufactured mostly on a thick card and sprayed with a textured surface.
Pastelmat Card (Also available as a board)
Made by Clairefontaine a French company. It’s made from a fine coating of cellulose fibres. It grabs hold of the pastel and allows many layers of pastels and it is water resistant. Pastelmat allows you to create very fine detail. For beginners it is easier to use harder pastels such as Conte, Jaxell, Koh-I-Noor for your tonal underpainting. Cheaper pastels tend to be harder. For any fine details in your painting use harder pencils such as Carbothello, Faber Castell Pitt, Derwent, Conte. A lot of detail can be achieved with Pastelmat card, it is excellent for all types of painting styles and realism / hyper-realism
DO NOT spray Pastelmat with fixative unless you intend to add more pastel on top. Always test on a piece of scrap first… always! Spraying with fixative tends to darken your work and can often leave tiny dots of spray. It can ruin your painting but it can be rescued by adding more pastel.
Velour Paper
Made by Hahnemuhle a German company. It is very soft like velvet with a very short pile / nap just like a carpet on a much smaller scale. It’s an ideal pastel paper because it takes many, many layers or pastel. Velour produces a soft finish to paintings. It requires softer pastels, the harder pastels don’t work so well, partly because they are harder and partly because they have less pigment. Softer pastel pencils work better such as Koh-I-Noor, Bruynzeel and Caran D’Ache. Jaxell and Koh-i-Noor pastel sticks and pencils are a good starter range to use on velour. That is not to say other pencils will not work but you may have to adapt your technique or apply more soft pastel before using them. Velour paper can be sprayed with a few light layers of pastel fixative but always test that your can of fixative is working properly first. Many artists struggle with velour because the pastel can fall off or sink into the velour. Some artists rub the pigment right into the pile of the paper and other spray if vigorously and accept that it will darken. Whichever you choose to do, experiment first.
Velour and Pastelmat seem to be the most popular choices for pastel artists, followed by sanded papers. And with good reason. They hold lots of layers. I refer to these papers as Marmite – you either love Velour and hate Pastelmat or vice verse. But I am discovering that it is possible to love Marmite! It’s all about technique and adapting your technique to the paper.

4d. Best Beginners Pastel Paper
I advise my students to try all the papers to find the one that suits them best. But for practicing I recommend wet and dry paper because it’s inexpensive and a good quality paper that will make your pastel colours vibrant, not dull like some traditional papers can be for inexperienced artists.
5.Equipment you’ll need to get started
There are a few things that you’ll need to get you started on your pastelling journey, to make life easier and to help you achieve the effects you desire.
5a Table Setup
You’ll need a board to work on a slope or a board and an easel to work upright. Working upright or at an angle is best – because any loose particles will naturally fall downwards. It’s also a good idea so avoid straining your neck and your work isn’t distorted because you’re viewing it at an angle.
You’ll need masking tape for securing your work to the board or a bulldog clip for traditional pastel paper.
Kneadable Putty rubber for corrections and Glassine paper (like tracing paper). You can use this to lean on so you don’t smudge your work. You can also use parchment paper or tracing paper or any smooth paper as a substitute.
Kneadable Medium Putty Rubber – this is the best kind of rubber for soft pastel
Damp Cloth for your hands – imperative for beginners.
5b Blending Tools
You can blend pastel on traditional pastel paper with your fingers or use tools like cotton buds and tortillon and rubber blenders. Packing noodles from any parcels you receive are great blending tools and a piece of pipe insulation or the end of a pool noodle. Try old makeup brushes too. If you are using wet and dry paper or sanded paper you mustn’t use your fingers without the pastel down first or you will have very sore fingers! Please be careful.
Tortillon blender – a coil of rice paper that enables you to blend soft pastel. I can show you how to use this simple tool in many different ways
Rubber blender – I use a size zero with a tapered point.
5c Sharpeners
Pastel pencil sharpening is an art in itself! Whilst crank handle sharpeners (Swordfish or Dahle are good brands) and work from some artists, For others they are useless. They go blunt fast for me so I use a knife and sand paper. I have two videos on sharpening pastel pencils. The first is the basic technique of sharpening pastel pencils which is ideal for beginners.
5d Dust Blower
It’s not a good idea to blow the dust off your work. The dust is very fine and goes everywhere when you blow it. Also, you are in danger of spitting on the paper which can ruin your work – it can even make a hole in the paper! A dust blower can remove pastel and help you correct a mistake. Use a dust blower gently! You can buy a dust blower (aka Camera Lense Dust Blower) from a camera shop or online.
6. Fixative
Fixative can be used to fix your work so it doesn’t smudge. BUT It’s personal choice to use fixative or not as it can significantly dull your work and not always provide the protection you are after. Never spray soft pastel art without testing on a scrap of pastel paper first. Test the nozzle works properly and practise your technique. A pastel paper like Pastelmat doesn’t need fixing because the paper holds the pastel so well.
7. Safety
- Here are my top safety tips so you have the best experience with soft pastels
- Always read the labels of your supplies.
- Never have food or drink around you when using soft pastels
- Wash your hands before you start and when you finish.
- Never blow pastel dust with your mouth. Gently tap the back of your work or tap the paper on a table. Or use a piece of old / low tack masking tape to lift dust off your work.
- Keep a damp flannel to hand to wipe your hands if you need to. (This keeps your work from turning muddy brown as well) You can read more here about how to keep clean with soft pastel
- Use a good quality pastel paper that grabs the pastel and holds on to it. Like Pastelmat or Wet & Dry paper.
- Use a damp cloth to clear up your work area.
8. Techniques for Beginners
The techniques that I find most useful for beginners are Layering, Blending and Pressure
8a Layers
Learning to layer soft pastel in thin layers is key to creating beautiful effects. Thick layers have their place and are great for subjects like clouds and skies
8b Blending
Blending is a simple technique to create beautiful transitions of colour. Depending on the tooth/texture of the paper you have you’ll need to ensure you have enough pastel on the paper to get the pastels to blend.
8c Pressure
Pressure is the most important technique you can learn. Learning to use very light pressure will enable you to vary your pastel strokes and create texture and depth. Combine this with layering and blending and you start to create beautiful art.


Are you a beginner?
Download my
FREE Quick Start Beginners Guide & 2 FREE Tutorials